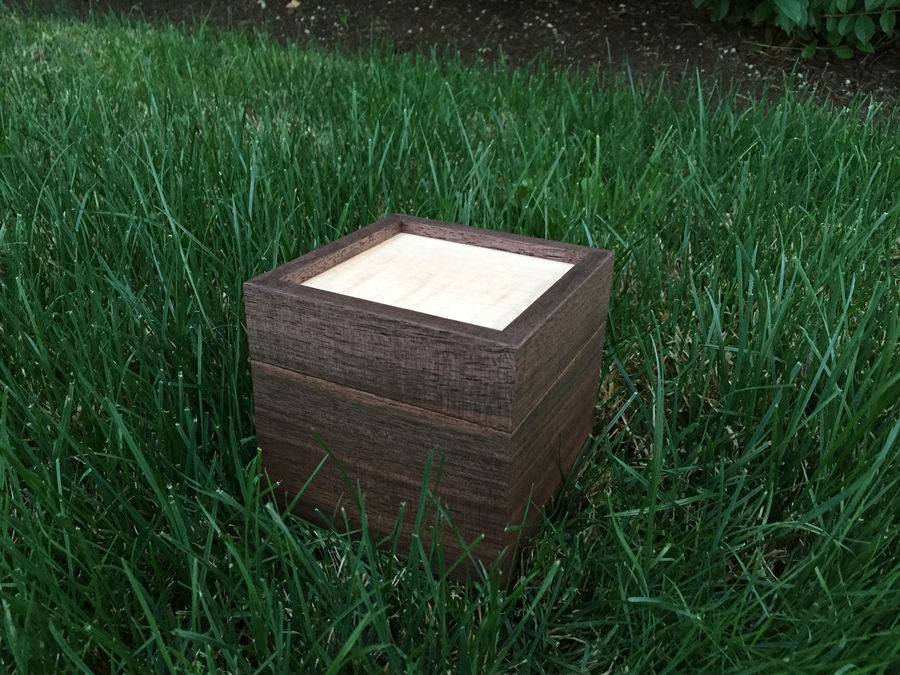
Walnut Keepsake Box
Years ago my wife lost her wedding ring, and while we got a replacement made, the center diamond came unmounted. The ring sat in a box on our dresser for over a year in a plastic bag. My wife expressed desire to have the ring fixed for our anniversary, which I kindly obliged to. I didn't want to just give her the ring by itself, so I decided to make a nice box it could go in and be used later for keepsakes, or be sold if she doesn't wish to keep it.
The box is made from quartersawn walnut pulled out of a firewood pile and some curly soft maple cutoffs from a recent project.


The heart of this project came from these pieces of firewood I was able to "borrow" from a friend's firewood pile. There's a lot more pieces that are bigger, but I figured these would be more than enough for this project.

This is what's hiding underneath. You can't beat air dried walnut for color or clarity. I jointed a face of each plank and resawed them down to 3/8" or so.

I got about 2 full width pieces from each plank and one super thin piece of an offcut. I should just throw those bits away since they won't be good for much, but you never know right? I was able to get the 4 walls of the box from two of these pieces. That leaves enough for another box down the road if I want.

Skipped the boring parts of squaring up the stock, unfortunately skipped cutting the miters. I used a dedicated miter sled I made for my tablesaw, as I've found out the only way to get good miters is to have the workpiece riding on a sled and not the saw top.

The maple bits for the top, bottom, and inside walls all came from a scrap cutoff of soft curly maple I had in my burn pile from another project. I was upset about that project because it was a client job and they had me stain the curly wood (no bueno), so this was my way of giving those curly boards one last chance at looking properly good.

I made the grooves for the top and bottom on the table saw, using the pieces of maple as a gauge for the width.
The fit was good. Strong enough to hold the wall, but was able to get it in and out without grabbing a mallet.

Here's the rest of the sides checking fit. I didn't bother smoothing the insides because of reasons that will become clear later.

Test fit with top and bottom looks good.

Applied blue tape to hold joints as they should be for glue up. I've never had a bad experience doing my mitered boxes via the blue tape route. I generally throw on two small band clamps after I tape up the last joint just to cover my bases.

Glueup was an overnight wait since I was using Old Brown Glue. I started using this stuff a year ago after I found out it doesn't affect finishes. Note that I left a small piece of tape to indicate which side I wanted to be the back of the box. Now time to see the band saw about opening this up again.

I don't have the shot, but I used my resaw fence on my bandsaw to cut the lid from the box. I measured 1/3 the total height of the box from the top and cut it there. I traced lines around the whole body to make sure I was cutting straight and not drifting. The new edges were a little rough from the blade, but I used my block plane to smooth them up and remove the saw marks.

This is why I didn't smooth the insides. More curly maple offcuts. This was hard to dial in on the miter sled, but the pieces were able to fit pretty well with minimal gaps after some fine tuning. They were a little uneven on the top due to thickness (not totally parallel sides), but I'll address the full repercussions of that later. Again, my block plane was excellent at evening them all up.

Marked in the placement of the hinges. Last year I bought 4 sets of hinges when Brusso was doing their sale on the small size hinges they offer. I'm glad I finally had an excuse to use a set!
I figured out the placement by following instructions from "The Joiner and Cabinet Maker" from the Lost Art Press. The center to center spacing of the hinges is equal to half the width of the total box. I then simply centered them in that spacing. I marked the locations out with a pencil, then used a marking knife with the physical hinges to cut in the locations of the mortise.

I had glued on the insides at this point, but if I were to do this again, I would wait until I had these cut. I wasn't able to use my marking gauge to mark the depth as easy as it would be without the inner wall. Before defining the knife lines with my chisel, I would make a relief 'wedge' out just inside the mortise. This allows the wood to get out of the way when you're defining the outer walls. If you didn't, the chisel doesn't cut straight because the wood doesn't have anywhere to move when the chisel cuts.

Pretty tight fit! Just had to remove a little more on the baseline to get it seated even.

One down, three to go.

This is what I was talking about earlier. I marked in with my chisel the two relief lines before I defined the knife markings.

Two in, don't screw up now.

The top got interesting. I didn't realize this on the base because it already had a backing on it, but I needed to support the inner wall of the box while chiseling out the hinge mortises. It was so thin I was close to blowing through the inner wall. Thankfully I saw the flexing grain before it was too late. This bottle opener offcut was just the right size.

All 4 mortises cut, and the hinges fit! One of the mortises in the top was slightly off, but not enough to cause huge issues.

With these hinges being brass, it's important to cut the threads in with a stronger screw. Brusso includes a steel screw to do this so you don't break off a brass screw cutting the threads.

Just making some final smoothing passes on the outside before finishing with shellac.

So, this project was going WAY too well. So I decided to make it a challenge and drop the box off my workbench.
Sigh. It fell off the stand I had it on while the shellac was drying. I wanted to cry at this point, but I didn't. I grabbed some sawdust, rubbed it in my eye to soak up those non-existent tears and grabbed an iron. I have never had to steam out dents before, so it was a little nerve racking.

Son of a gun it worked!

Dent gone, but the grain still looks a little off. I can deal with that, but I couldn't deal with a crushed corner when all the others were nice and crisp.

Not shown, but I chamfered all the interior walls so the lid could close. I also took a VERY light chamfer on the top and bottom of the opening. I didn't want to take away from the sleekness of the look, but if I didn't do anything, the walnut would have likely chipped over time.

Looks good from the front....

....and the back too!

CRITIQUE TIME!
This project wasn't perfect, but it gave me lots to learn from. The interior walls were tough to get tight, but that's because I was using stock that wasn't thicknessed parallel. (I don't have a drum sander, and my planer would have eaten the curly grain for breakfast.) This side looks pretty good right?

I just told my wife not to look in the front corner, because that's when it gets embarrassing. The gap in the back doesn't look that bad when viewed from the front. But there's no hiding the canyon in that front corner.

Here you can really see what I mean on the dent. I couldn't get the crushed look of the grain out, but it's luckily flat and level with the rest of the side.

Last thing: hinge mortises.
The hinges are made in such a way that if you mortise only as deep as the hinge plate, you'll still have a gap. (As seen on the right of this photo) This is because the two plates don't touch like you'd find on a big door hinge. It's hard to explain, but this image shows the problem well. If you shut the hinges, the tips will touch but you have a slight gap next to the barrel. So in order to get a flush lid, you need to mortise the plates ever so slightly deeper to compensate for that gap. This doesn't seem to be an issue with the standard hinges, but I found it to exist on the 90 degree stop hinges.
The gap isn't bad, but it's enough to bother me.

This is what quartersawn walnut is all about. Beautiful grain! I'm shying away from using sandpaper on projects like this. The smoothing plane leaves such a clean and clear finish compared to the somewhat cloudy look that sandpaper leaves.


Thanks for sharing the beautiful box! A few things: