How To Make A Picture Frame
For mothers day I decided to make my mom a nice piece of wall art. I CNC'd the tree out of 1/4" baltic birch plywood and made the frames out of cherry and walnut. The frames measure 13"x16"(for 11x14 artwork) using 1 1/2" wide strips that are 3/4" thick. I dyed the backer board using an India ink and finished the frames using osomo Polyx. The frames look amazing and she loves them. She ended up picking the cherry frame since it matches all of the other cherry furniture I've made them over the years.
#pictureframes #woodworking #howtocutmiters

Finished picture first obviously!

To start out, I’m going to cut the artwork that’s going in the frame on the CNC machine. I’m making the panel out of 1/4” baltic birch plywood because I like the look of the layers when using the 30-degree V-bit.
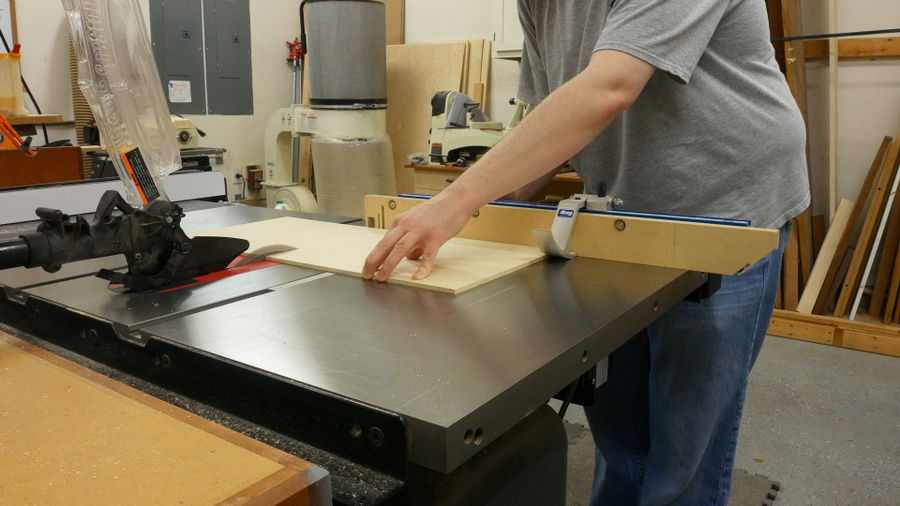
The frame is made for artwork that is 11 by 14 so I begin cutting the plywood scrap to size.

To hold the panel down while cutting the design I like to use double-sided tape. The machine is removing quite a bit of material so I need multiple strips.

The bit I’m using is a 30-degree v-bit sent to me by bits and bits company. It does an excellent job in cutting fine detail and also left a clean surface.


With the artwork out of the way I begin working on the frame. I’m making two of these frames because one of them will be going to my mom for her mothers day gift. One is made out of walnut and the other cherry.

The frame pieces have a final width of 1 1/2” inches so luckily I was able to get all 4 pieces out of one strip of lumber.

Before milling the lumber I often rip the pieces close to their final width to help reduce the amount of time it takes to joint one flat face. I cut the strips to 1 3/4” inch.

Next, I start the milling process and that begins with jointing one face and one edge followed by planing the pieces to a final thickness of 3/4”s of an inch. Finally, I cut the pieces to a width of 1 1/2” at the table saw.

The glass and artwork sit in a 1/2” by 1/2” rabbet on the edge of the pieces. There are several ways to cut this rabbet but I often use a rabbeting bit at the router table. You can use your table saw if you prefer.

I will make several passes to remove the waste to prevent tear out.

After each pass, I slowly raise the bit until I reach the final depth of 1/2”.

The final step is to cut the miters. This is a step that a lot of people have trouble with but with a few steps, you can cut perfect miters straight off of the saw. The first step is to set your miter gauge at 45 degrees and make a test cut. Double check the offcut with your combination square and see how close you are. Make any adjustments needed to the miter gauge and keep testing until you really dial it in.

With one end cleaned up on the pieces I measure 13 inches for the top and bottom pieces and make a mark. Next I transfer my mark to the back side of the piece so that I can line it up with my blade. I move the stop block over and butt it right up to my piece.

The most important part of cutting these pieces is they need to be the same length. The top and bottom are 13 inches and the sides are 16 inches.
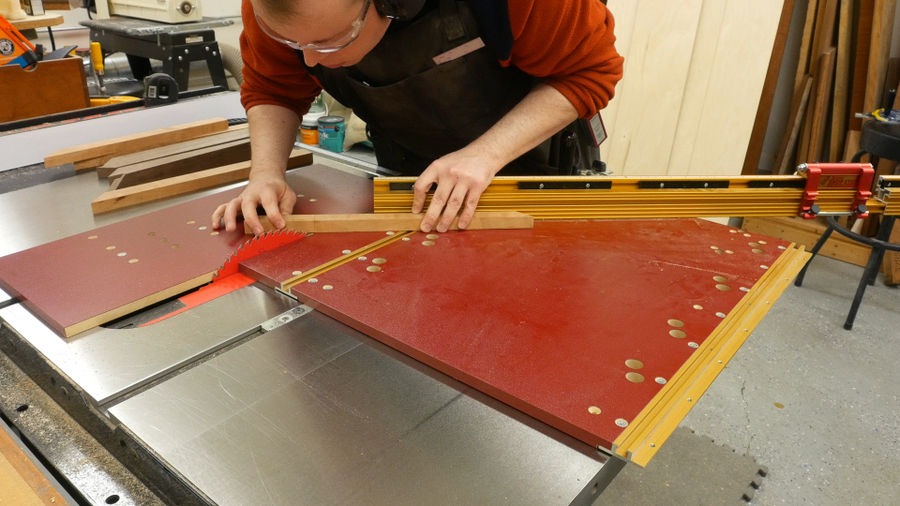


Now I can reset the stop block for 16 inches and cut the two side pieces.


There are several methods for reinforcing miters and I’ve covered them in previous videos. You can use splines, biscuits, dominos, and several other methods. For this video, I used my Festool domino since it was fast and easy.

I made a mark on each corner and begin cutting the slots with the domino set to plunge 12 mm.


Since the depth is only 12 mm and I’m using 30 mm dominos, I had to remove a little bit off of the end of the domino. I cut the excess off using my pull saw.

To glue up the frame I applied glue on both ends of the domino and placed the domino in the routed hole. Even though I used dominos, I still placed glue on the miters to ensure everything stays together.

When clamping miters you can glue temporary blocks on the corners but I find using these variable angle band clamps to be indispensable. They really pull everything together nice and tight and if your miters are cut correctly, you won’t have any gaps. My only issue is I need to buy another set!
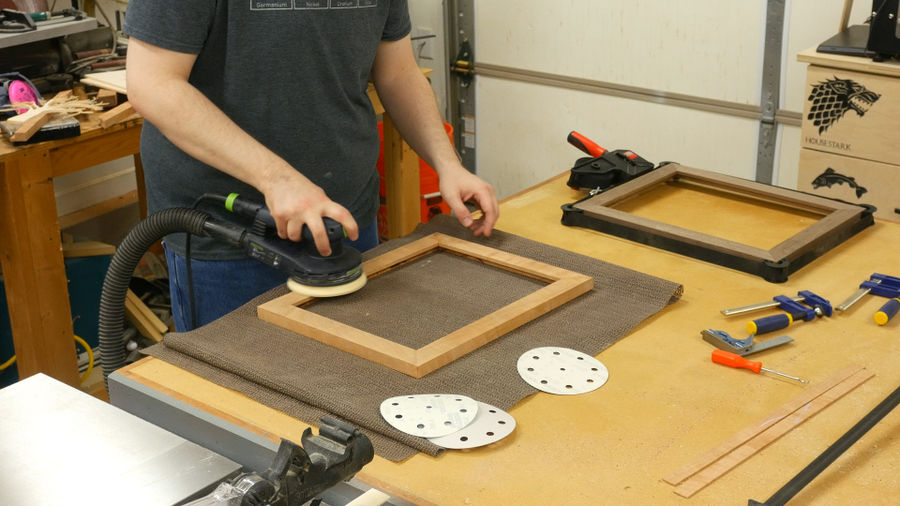
After the glue dried I sanded the surfaces with 120, 150 and 180 grit on the orbital sander. I broke the edges using 220 grit because I really like the look of the crisp edges instead of a traditional round over.

I find using a 220 grit paper does a good job of this. Just a few swipes are all it takes.


To add a nice contrasting background to the artwork I dyed a piece of 1/8” plywood using black ink.

I’ve used this product before in the past and it does a great job.


After ink dried I sprayed two coats of a water based poly to both the artwork as well as the backer board.


Next, I finished the frames again using the stainpad applicator. I applied a coat of Osmo polyx and after a few minutes of letting it soak in, I removed the excess finish using cheesecloth.


I didn't want a flashy, shiny finish for the frames, just something to darken the cherry and walnut with a satin/flat appearance. I wanted the artwork to do all the talking.

To assembly the frame I first started by cleaning the glass since it's easy to access. Next I put the glass in, followed by the artwork and then the dyed backer board.


To hold everything I installed 4 picture frame turn buttons. One in each corner and a then installed a sawtooth picture frame hanger on the top of the frame, centered.


And that's it. These frames are easy to knock out in a weekend and look great. The key with these frames, in my opinion, is to look very minimal slash modern in appearance and I think they came out perfect. The cherry will darken with age and look amazing. The walnut, with its straight grain and color also looks nice. I've already had my mom over and she picked the cherry frame, so I'm going to be hanging the walnut frame in my office.


- Views 148
- 4
- Collection 0
- Report project


