Drawers For The Workbench
Finally, a little bit more storage in the workbench area. 6 Deep drawers installed in a way that doesn't otherwise interfere with the functioning of the bench. Can't wait to declutter the shop and fill it with stuff.
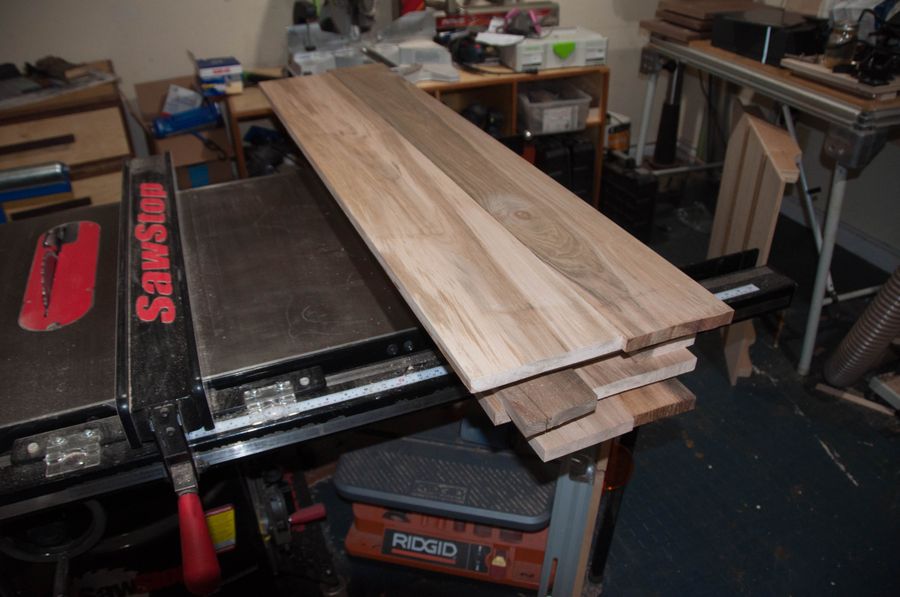
These boards were pretty tough .Rough sawn 4/4 with a lot of sapwood/heartwood, splits, knots, etc. I got a great deal on a fair amount of this material and have been trying to use it for projects like this that don't need to be cosmetically perfect. Anyways, I'll save you the boredom of watching me mill them flat, square, and straight.

This project started with a bunch of panel glue-ups. This is the top panel. I like this picture because it shows that panel glue-ups do not require a ton of preparation, alignment helpers, or superstition. Just mill the boards proper, glue them up, and put them into some clamps on a flat surface. If they're not lining up perfectly, knock em around with a hammer under clamping pressure till they are.

Because you might have several panels to make, and you don't want to be wasting time on that nonsense. Two of these panels will be the top and bottom of the case. The third will be crosscut into four pieces for the sides + vertical dividers inside.

Out of the clamps this is what they look like.

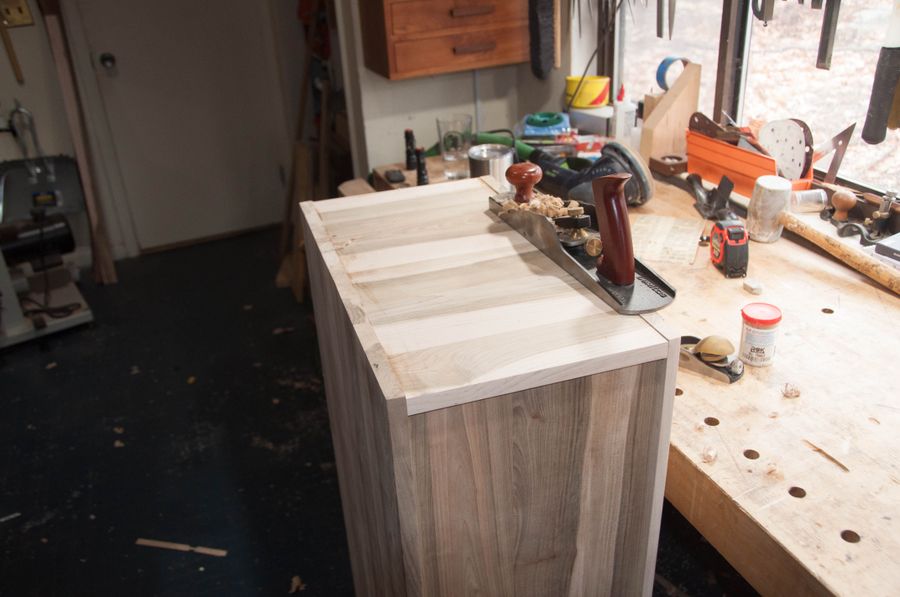
And then, cleaned up. You can do this with just a sander, but the hide glue really gums up the paper and slows down the process. It's much quicker to take one pass with the cabinet scraper (shown) just to get any surface glue off of it. Then the sander quickly turns the panel into something finished.

Originally, I was going to make a plywood back panel, but I had a few boards left over from the large panels so I decided to mill them down the 3/8" and make a solid back panel. The case is only 12" tall, so I'll leave a little room in the grooves for expansion and just let it float.

And into the clamps. Same procedure as before.

Once the panels are at least nominally cleaned up, they can be ripped..

and crosscut to final size.

It's always really comforting when you get to the end of a process and there are four legitimately identical parts stacked up. Makes things go a lot smoother later on.

Now, setting up the router to cut some grooves for the back panel.

Through grooves on the sides.

And stopped grooves on the top/bottom.

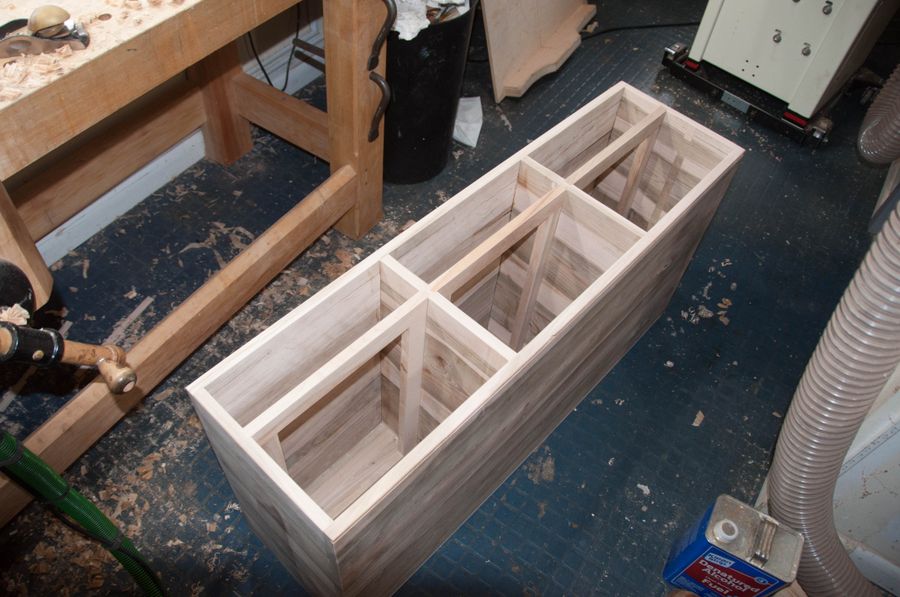
Next come the dadoes. Between the top and bottom drawers, I'm going to install web frames. There are "higher end" ways to do this--using sliding dovetails, but since this is shop furniture I'm going with fast and simple.

I don't cut a lot of dadoes. Decided to try it at the router table. Went pretty well.

Other than the big mess, that is.

And the extra dado that I cut in the right side. Oops.

I took an offcut and glued it in place. This is on the inside of a cabinet, so no-one's really gonna see it. Note that I replaced the missing wood with a piece that had the same grain orientation. This is somewhat important--the panel might do funny stuff otherwise.

Decided to use the workbench vise as a big clamp to hold the repair in place while it dried.

Before leaving the project for a few days, I made sure everything was sitting on stickers with even airflow. Sometimes this turns out to be very important with freshly milled lumber--if you leave a board sitting flat on a table, it will often turn into a "smile" since the top will dry out faster than the bottom. This can correct after a few days, but I know that this tree is a little bit "move-y"--probably because the wood was stored in an unconditioned space and my shop has HVAC, so I'm taking precautions accordingly.

After being flushed up, the repair is good and the panel looks healthy again.

This workbench was designed to accept a sliding deadman, but due to the wide vise, I've not needed one. Unfortunately, that also means that the stretcher in front comes to a point. So I had to work out a way to securely mount a cabinet onto it. I decided to approach this by cutting a v-groove into the bottom of the case to catch the front stretcher, and making a rabbet in the back to catch the rear one. The case+drawers, empty, weighs about 100lbs, so it should lock securely in place and not move around.

First step is to mark out the positions of the groove and rabbet using the shape of the workbench.

Then I cut the v-groove with a plunge router.

Then marked out the rabbet.

Then cut the rabbet using a wider bit and a few passes, also using a plunge router.

Test fit? Test fit.

This side view should give you a better idea of the exact profile of the resulting panel.

The case is going to be put together with dominoes, so time to start doing the layout. It says something about how fast the domino machine is when it makes the layout feel like the "hard" part.

I used pencil marks for everything. It's fast and easy. Takes a little bit of practice to draw them all in the right places so that the right parts of the machine can reference off of them.

Then in about 15 minutes all of the mortises magically exist.

I used 4-5 for each of the joints, depending on how much help I felt the panel would need being flat.

The other hard part with dominoes is test fitting. They tend to get VERY tight, both because they are borderline oversized and because they are very dry, and tend to suck moisture from the surrounding wood and expand. Some people keep "sanded" dominoes around for test fitting. That's nice and all, but there are 48 dominoes in this project, and that's a lot to fool around with. Another solution is to glue them in on one side and then forget about ever handling them again. While it's hard to get enough grip to pull out a stuck domino with your fingers, it's easy when it's securely mated to a larger board.

Before I glue up the case, I want to build the web frames, since they'll help keep everything "locked in" and square during the glue up. First, I took some 1 3/4" wide scraps and planed them down to fit the dadoes.

Then I cut the parts and shoved them into the grooves to make sure it was all in the ballpark.

Then it's more domino layout, and domino joining.

And waiting for glue to dry.

Then the main event. This glue-up went pretty smoothly. That's not always the case when doing dominoed casework like this. Sometimes the boards get a little wonky and it takes some work to get all of the dominoes in their mortises holding everything proper.
Originally, I planned to leave the top and bottom a little bit proud, but after the glue-up I decided flush would come out better. Time to knock off some end grain.
A few more minutes with the sander + planes and it was all good to go. Shop furniture only gets to be at 120 grit, so this goes pretty quick.

Thought we were done? No way. Still have 6 drawers to make. So I grabbed a few more 12-footers from the garage.

And got to milling. Again, no gorey details, but a bunch of nice regular looking drawer parts at the end.

After a quick trip to Home Depot, I had a brand new sheet of 1/2" maple ply for the bottoms. The logistics of cutting that sheet in half in my tiny shop are interesting. It's hard to see in the picture, but there's a 2x4 beneath the cut line for the track saw to plunge into.

With a little more work at the table saw, these turn into nice drawer bottoms. Square, but not at final size.

For the past week, I've had all of the drawer parts stickered. Same reason as before. They stayed nice and flat. Whew.

For the drawer joinery, I'm trying a new (to me) method. Rabbets + dominoes. The goal is to bang out 6 drawers in 3-4 hours end-to-end.

This should give you a sense of how the rabbets are laid out. Note that it's slightly different in the front and back, since I want a pretty front panel, but would rather not have any interruptions in the sides towards the back.

Drawers piling up.

For reinforcement, I'm using the domino joiner to plunge straight in through the sides of the drawer into the front/back.

Then I glue the dominoes in place.

This is what it looks like when they're all glued in.

Once the glue dries (a little bit), it's time to cut them flush.

After sanding, they look like this. Pretty nice for something so quick, right?

Finally, I need to install a (store-bought) knob on each drawer.
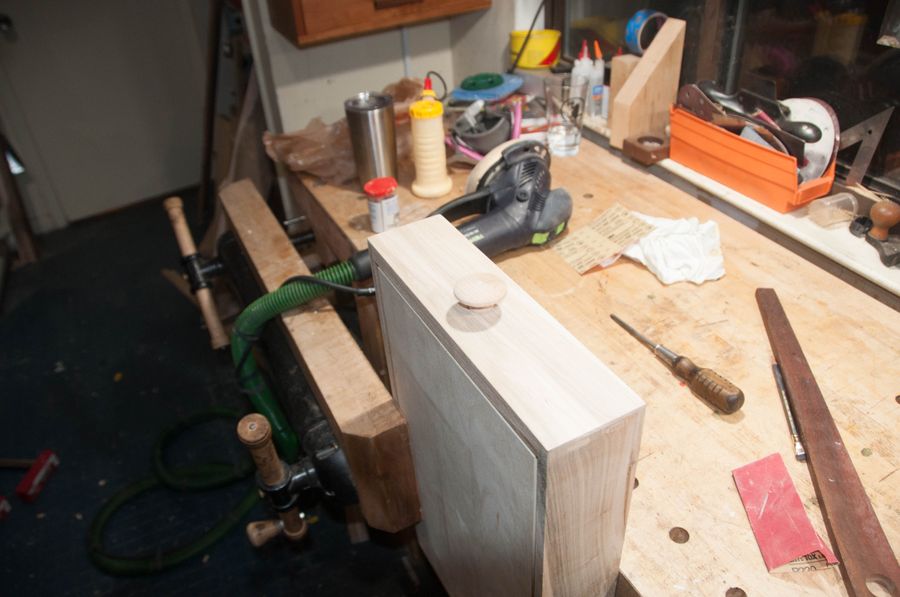
One drawer down, 5 to go.

I debated finishing this, or not, or painting it for about a week. Decided to slap something oil-based on it so it would sort-of color match the Maple+Danish Oil bench. Teak Oil was the easiest to reach open container, so it won.

Nice thing about finishes like teak oil is you can slap some on, let it sit, wipe it dry, and if you aren't picky about the end result, just start using the damn thing. I'm only doing one coat. This is shop furniture, and I'd rather be using it than fussing over it.

All done! Time to drop it into place and fill it with crap. Thanks for reading!


I now know how much work I have in front of me on this.
Awesome work! Is that a Holtzapffel Workbench a la Chris Schwarz?